A Flashers Embarassment

,

I carried out another detailed inspection of a new build property in Northamptonshire today and was immediately alarmed at the poor finishing seen to the stepped lead and apron flashings on the front elevation. Coincidentally, the brickwork was the worst I’ve ever seen on a new build property but that will be the subject of another blog. I am consistently finding that developers do not seem to understand the technical requirements when it comes to installing leadwork and I always advocate the need to investigate the quality of lead installation beyond surface appearances; particularly when surface appearances are as bad as seen in our first image.

OLYMPUS DIGITAL CAMERA
Poor apron and stepped lead flashing details: Note lead securing peg visible to mortar bed joint.

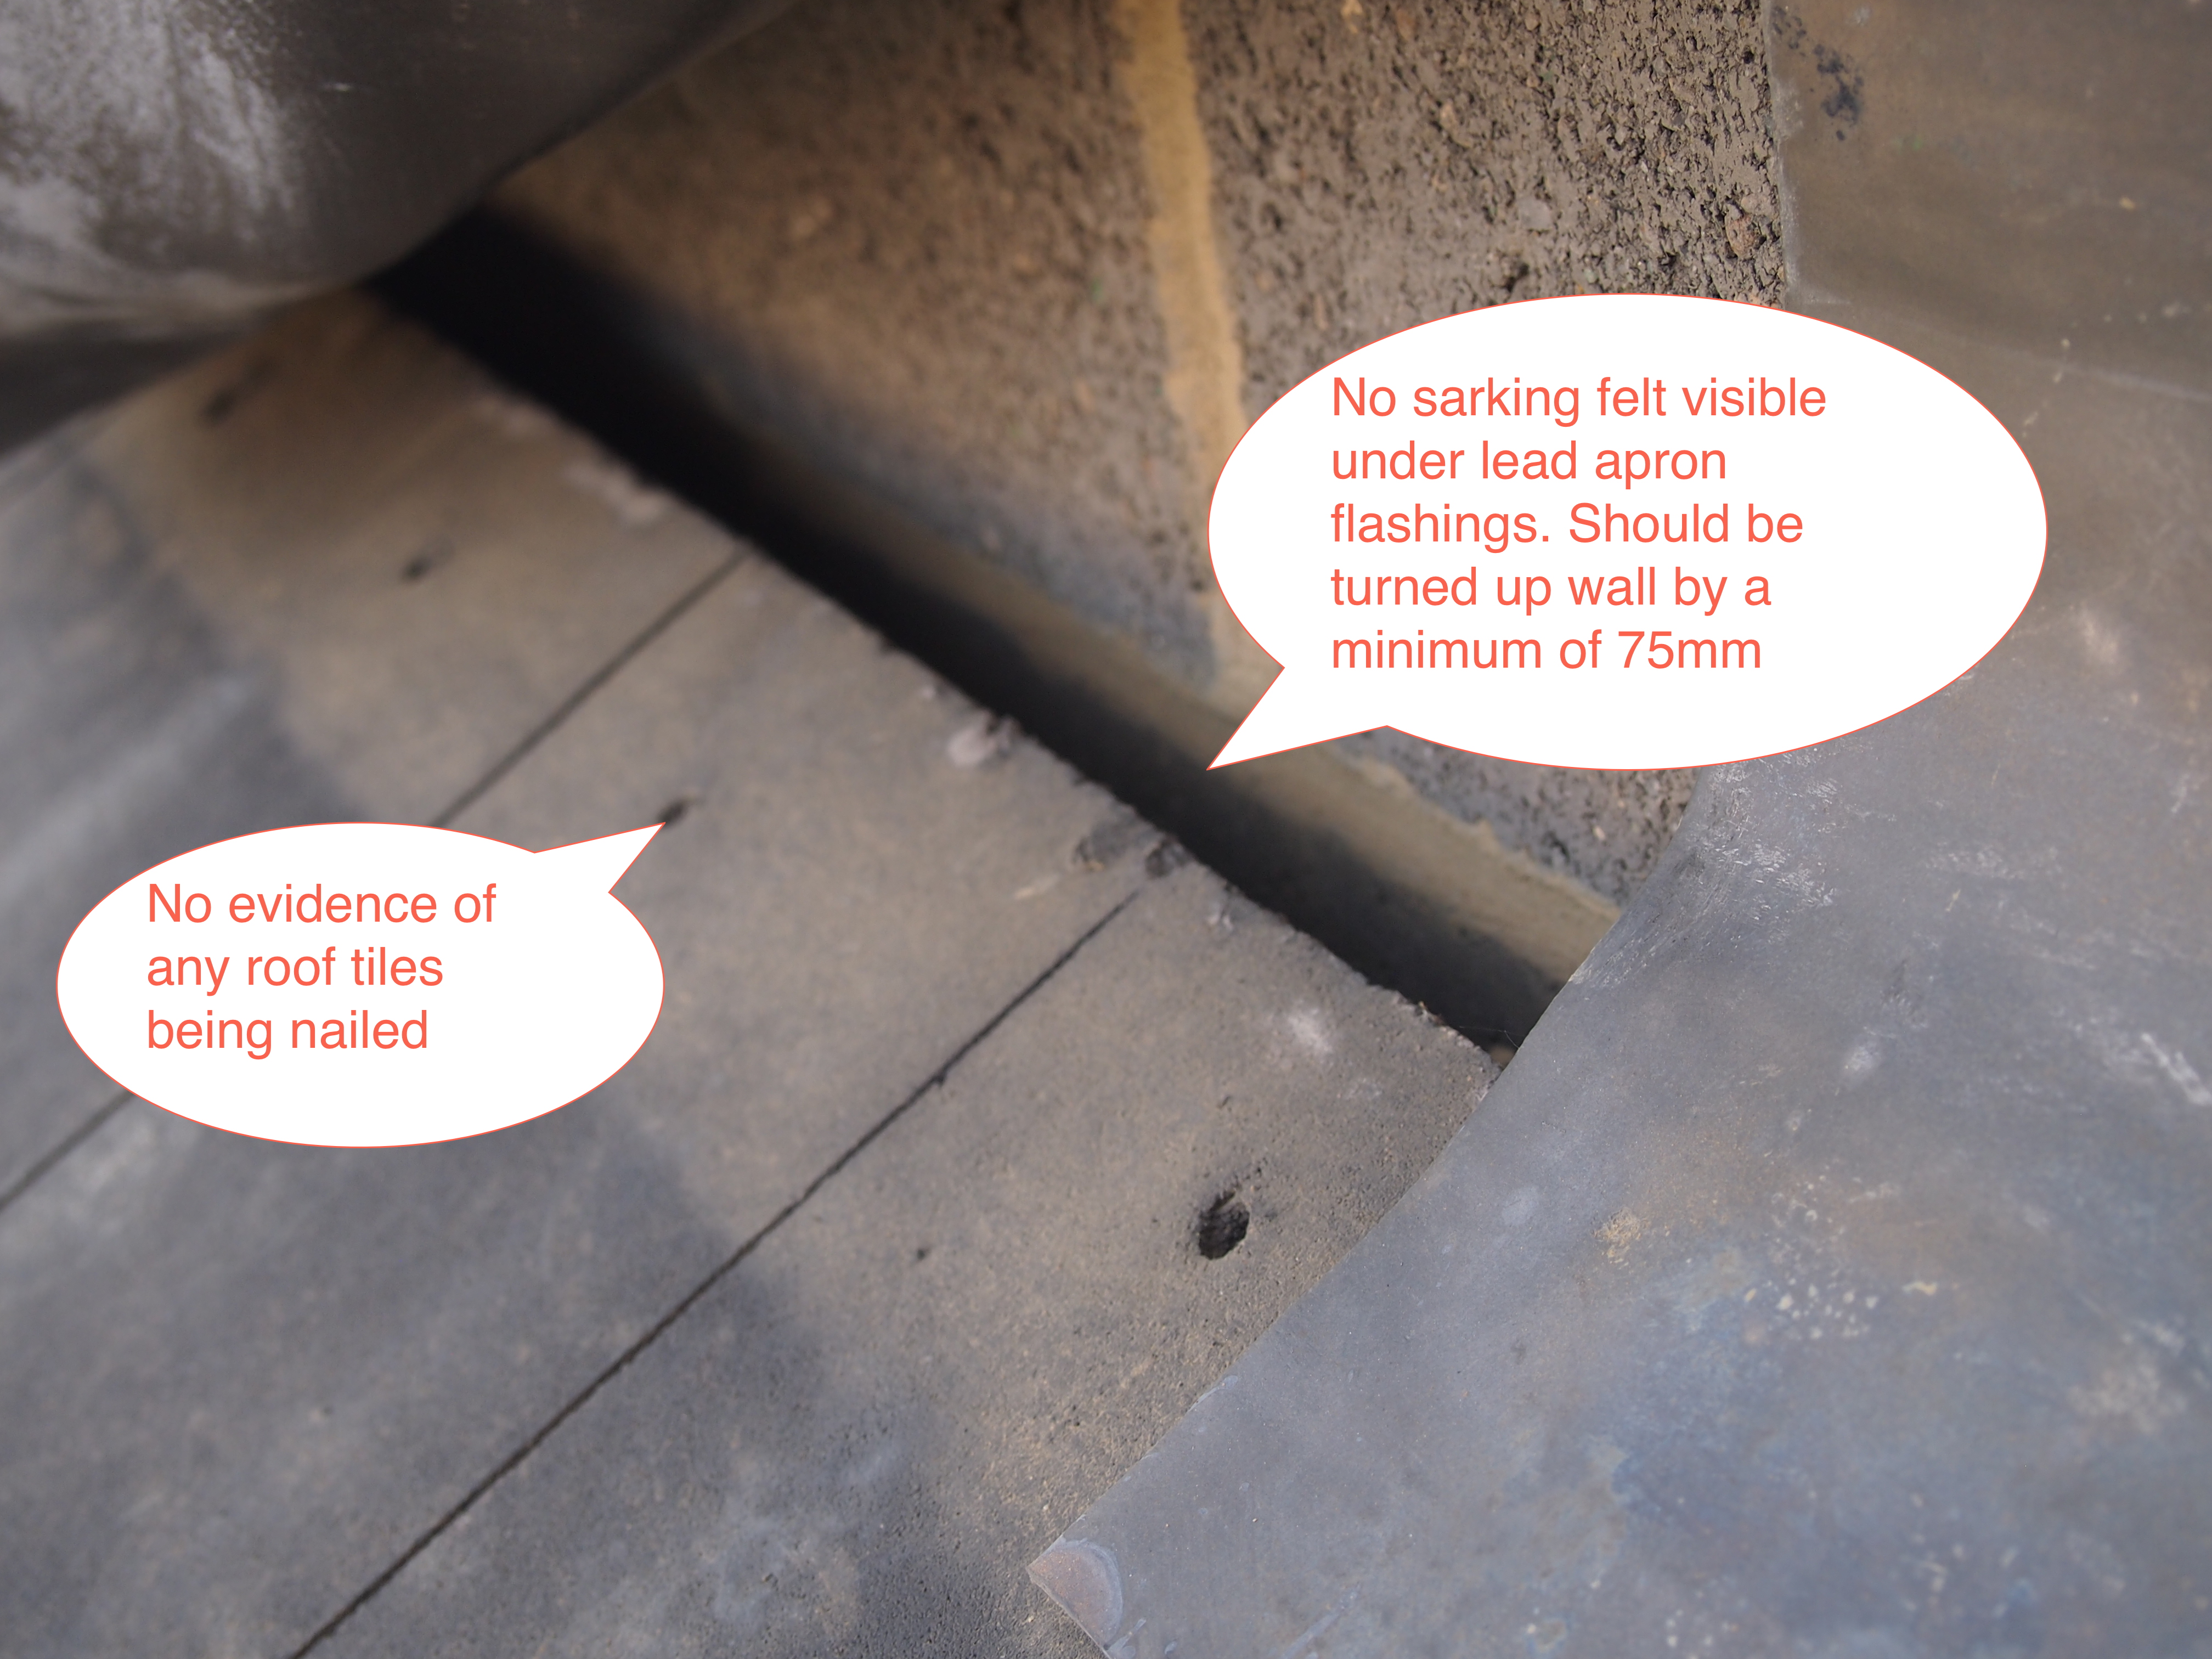
Lead should be turned into the bed joint a a minimum of 25mm and should be securely lead pegged at 450mm centres. Once pegged the bed joint can be pointed up or sealed with a proprietary lead sealant. Lead has an incredibly high coefficient of expansion, which is why it should not exceed lengths of 1.5m when installed, this is all about limiting or managing the level of differential expansion at junction details. Failure to allow for differential expansion is a primary cause of lead flashing failure. This particular apron flashing was installed to the garage entrance porch so was accessible for closer inspection from a ladder. Lifting the apron revealed an easy route into the building for wind driven rain and NHBC guidance had not been followed with regard to extending the sarking membrane and turning it up the wall underneath the apron flashings. The NHBC recently released a technical bulletin that included a reference to this common defect, it is one they are consistently finding and my experience of this problem mirrors theirs. So even if the apron flashings were correctly installed there is no secondary barrier to prevent issues with wind driven rain.
The keen eyed amongst you may have noticed that a lead securing wedge is visible to the left hand side of the bed joint in the first image. Whilst this inspires some hope that the lead has been securely wedged this hope is offset by virtue of the fact that the wedge is visible. A correctly installed lead peg or wedge should not be visible and if it is then the weather resistance of the bed joint is compromised in that area.
When suspicions are raised to the degree they were raised on this inspection then there is a strong argument for gently tugging the corner of the lead. Correctly installed lead will not move whereas poorly installed lead will tend to do this…

OLYMPUS DIGITAL CAMERA
Lead not turned into bed joint by the required 25mm

There was 5mm of lead turned into the bed joint as opposed to the required 25mm and lead wedges were installed but not providing a tight interference fit to secure the lead. In fact the only thing holding the 5mm of lead in place was a bead of grey mastic and this lead apron was always destined for very early failure. On the upside, the installer had managed to overlap sections of lead by the minimum required 100mm but there was very little else to redeem this installation.

The lead aprons to the garage porch were further susceptible to wind driven rain because there had been a complete failure to clip the free edge of the lead at 450mm centres; this would prevent wind from lifting the lead and therefore increasing vulnerability to rain.

OLYMPUS DIGITAL CAMERA
Leading edge of lead apron not clipped

Moreover, the lead apron flashings were further susceptible to wind driven rain since the roofer had failed to comply with NHBC requirements relating to the need to overlap sarking membrane and turn it up the wall by the minimum required 75mm.

OLYMPUS DIGITAL CAMERA
Where is the sarking?

Incidentally, I also measured the lead thickness with a micrometer to ensure that code 4 lead was installed and it was the required 1.8mm; it is not unusual for me to find that cheaper code 3 lead has been installed.
It worries me that the plumbers art of installing lead to a high standard is becoming lost but in this particular case the lead installations were as simple as it gets. You can make up your own mind as to whether this is poor quality workmanship, complete ignorance of the guidelines relating to lead flashing installation or a combination of both problems.
Joe Malone BSc(Hons) MCIOB MCABE

11 responses to “A Flashers Embarassment”

  1. Jason Dawes avatar
    Jason Dawes

    The 3rd from last photo where a tug on the lead caused it to pull out appears to show the cavity tray installed one course too high. This is another common problem on new build sites.

    1. admin avatar
      admin

      Absolutely right Jason but can we reasonably expect that to be corrected? I think I have encountered the cavity tray being installed too high on 3 occasions just in the last 4 weeks.

  2. phil avatar
    phil

    you think that is bad and it is , but i deal with this product on a daily basis and it is ten times worse than you are making out, to the point that the government needs to intervene as it is now a safety issue. in my area the lead work falls out of the wall chase, but these sheets are massive and heavy and could kill someone, it is fitted sometimes 4 brick high and not 2 as if there is a glut of the stuff and not secured plus inferior lead from abroad is used that corrodes and leaks within 2 years. remember this stuff is toxic and should not be fitted in the twenty first century. my photos would make you cry and the brickwork is not much better these buyers will all end up in negative equity with homes that are falling down around them. by the way that stepped flashing should have started a brick higher. and so much more.

  3. Nathan berry avatar
    Nathan berry

    When the flashings have lifted and water is leaking in and causing the bedroom wall to mouldy is it safe to use the chimney to help keep it dry or best to not have a fire until the problem is fixed?

    1. Joe Malone avatar
      Joe Malone

      Using the fire will likely have little beneficial effect on the penetrating damp, so get your flashings fixed as soon as possible.

      Regards

      Joe

  4. Philip Campagna avatar
    Philip Campagna

    Lead flashing on extension of a new build has a green appearance. Could this be a chemical reaction or algae?

    1. Joe Malone avatar
      Joe Malone

      Hi Philip,

      I couldn’t say without seeing pictures but if its green, then I’d guess algae.

      Regards

      Joe Malone

  5. hugo avatar
    hugo

    Hello there,
    I recently had a full width loft extension done. There is a small leak on the neighbours side. My contractor installed the lead flashing by bedding in the lead flashing with mortar. It’s not tucked into the joints. The water on the roof runs towards the flashing and seems to run underneath so I had the edge of the flashing sealed with mastic.
    There is still a leak although it may be at the joint underneath the flashing where the tiles meet the party wall. Is it my builders liability???? It would need scaffold to fix so it’s an expensive job. Are there are any other roofers in North London you can recommend? My contractor is unlikely to accept liability and do it properly.

    1. Joe Malone avatar
      Joe Malone

      Hi Hugo,

      I don’t know of any roofers in your area and I don’t recommend contractors anyway because if anything goes wrong, then I tend to get tarred with the same brush.

      From what you have described, then yes, it would appear to be the builders liability. The lead is not installed to lead sheet association guidelines. It should have a minimum 150mm upstand, be turned into the bed joint by a minimum 25mm and securely pegged at 300mm intervals before the joint is sealed.

      Regards

      Joe Malone

  6. Tony avatar
    Tony

    I’m consumer. I had full width pitched canopy roof redone and lead flashing is raised up above some of the mendip roof tiles, e.g. not hammered down so it follows the contours of the tiles. I see other neighbours are hammered down and many of my tiles are also. Not sure if this was because not enough lead flashing was bought, I’d see this is more apparent in the centre of the roof. Builder advised this would bed down. I’d say the level of raise on flashing you could get fingers in between and it looks odd.

    Does flashing bed down by that much over time? I’m guessing from reading your article until it does (if it does) I’m susceptible to wind driven rain.

    Thanks for advise.

    1. Joe Malone avatar
      Joe Malone

      Hi Tony,

      No, it won’t ‘bed down’ and it should have been properly dressed into place using a lead bossing stick.
      Critically, the sarking should have a minimum 75mm upstand so any wind driven rain will be dealt with by the sarking, which in turn should divert that water into the gutter.

      Regards

      Joe Malone

Leave a Reply

Your email address will not be published. Required fields are marked *